Saturday 28 May 2011

Altered Pin Board

I have two pin boards at home, one in the kitchen, which has all sorts of info on it and one where I craft that Lucy uses to put her makes so they are safe. We like to try to be organised!! So when I was asked if I could make something that would help Niamh to be organised I thought of altering a plain pin board. The whiteboard at the bottom is divided into the five days of the week so Niamh can keep a check of what is happening at school and home for her.
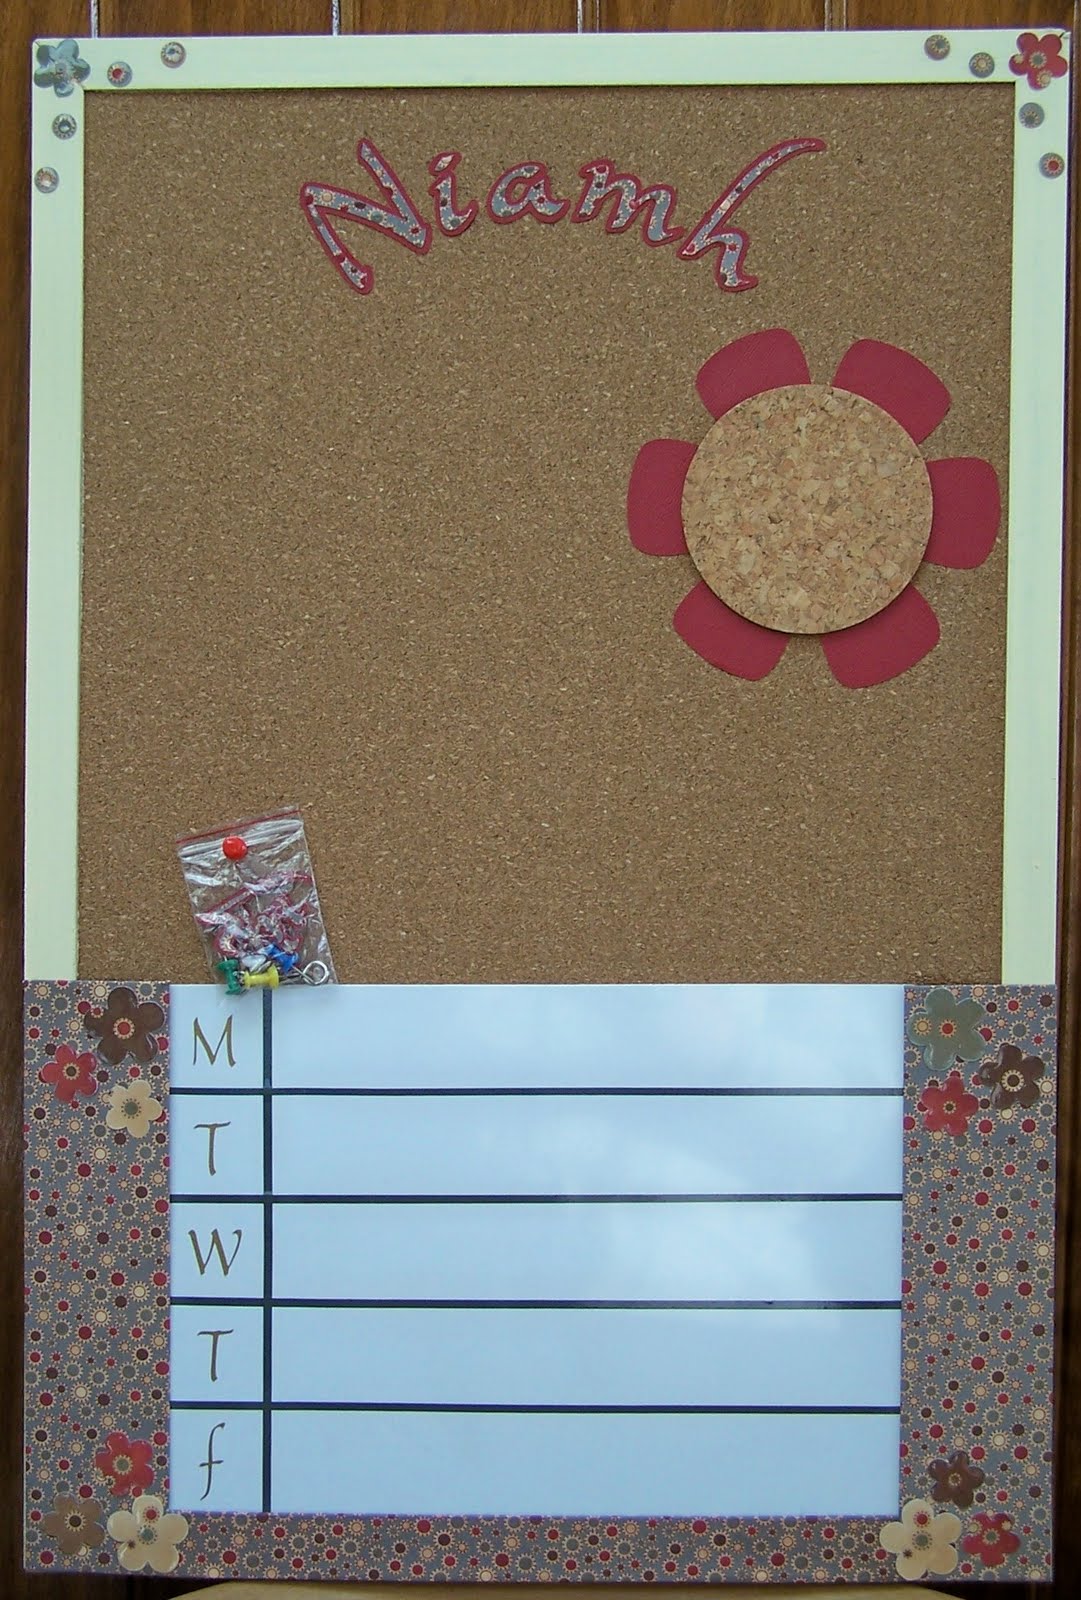
  I started by painting the frame cream with acrylic paint (two coats). I cut Niamh's name and the large flower using the cricut. The flower middle is a cork drinks mat that I had at home just waiting for a project like this, I attached the cork to the card flower with glossy accents.
Next I made the 'pocket' for the whiteboard to slide into from chipboard and covered it with paper from the Cosmo Cricket range. I used  grey vinyl for the rows and columns which I cut on my paper trimmer. The letters are cut from gold vinyl and again I used my cricut to do this.
Finally I cut out some of the flowers from the paper and punched small circles for added decoration in the top corners, these then had glossy accents added to them, as I know Niamh's Mum loves the raised feel it gives.

Wednesday 25 May 2011

Ruby Wedding Card

My Godmother and her husband have recently celebrated their Ruby Wedding Anniversary, they celebrated in style with close friends and family.
This is the card I made for them, I was really pleased with it. The ribbon acts as a slider, I'm not sure what the name of this style of card is but I call it a slider card.
 I embossed the front of the card with satin embossing powder after stamping the flourish, you can see this best in the top left of the photo, I also used cream satin ribbon and red organza ribbon then added the hearts. I think this card looks so elegant. It would make a fantastic invitation for a wedding or engagement
.


Sunday 22 May 2011

Strawberry Picking.

I just love how luscious these strawberries look together, they are the right size to hold a small gift or chocolate. The template I used is by Sherry Brickey, I was linked back to it so I am sorry I do not know the name of her blog name. I used my cuttlebug swiss dots folder to add the strawberry seeds which I then inked over using a charcoal colour chalk ink.


The green stalks are made from lime green card and inked so they look muted, I did use a darker green card to start with but it did not look right to me.
I think these would make fantastic place settings at a summer party.

Thursday 19 May 2011

Cherish Punch - Martha Stewart

I made these two cards using my new Martha Stewart punch, Cherish, the edge punch is amazing and when it is used with the corner punch you get the fantastic top note shape and the border of dots.
I made both cards using a paper pad that came free with a magazine last year. The colours are very summertime and I just love the dots. I used my vagabond to die cut the butterflies
The small card was one of those makes when you are not sure what it is want but suddenly everything falls into place and you are very pleased with the end result.

Monday 16 May 2011

Trio of Men's Cards.

Here are three cards that I made with men in mind. The tie card in the middle is similar to one in Papercraft Inspirations from about two years ago. The suit and tie card can be adapted for many occasions, I think it would look fab in wedding colours, maybe as a thank you for the best man and ushers. The star card can also be adapted, you could stamp or emboss the top half or add more stars.
I like to keep some men's cards handy as sometimes it can be so hard to know what to make for a man.

Saturday 14 May 2011

Tissue Flower Card

This is the card Natalie did at the Craft Buddies Crop in sunny Sea Palling, the flower is made from layers of tissue paper, lace, pearl brad and stickles.

I love the way it looks so vintage, the photograph does not really do the card justice.

Tuesday 10 May 2011

My Vagabond.

Here's a pic of my much loved Vagabond and another Vintage suitcase. I just love using the Vagabond it is so easy to use and gives great results every time. The best part of the Vagabond for me is the reversible motor, it suits my left handedness and Lucy and I have discovered we can have the Vagabond sitting between us and still use it easily with the push of a button. The only down side I have discovered is that not all the stickers stick so well, but I can solve that with some glue....

Friday 6 May 2011

Shirt and Tie Card.

This is the card we will be making at the Craft Buddies Crop at Tithe Barn, Horstead on the 14th May.
It looks great as a Father's Day card but could also be used  colour co-ordinated for weddings etc.

Tuesday 3 May 2011

Bags and Boxes

Here are the bags and boxes we made at our second workshop. I had a great day so I hope everyone else did too. We did over run so the take-out box had to be completed at home but we finished the other five and they all looked amazing. 


My favourite is still the vintage suitcase.

Monday 2 May 2011

Men's Wallet

These fabulous wallets have been around for a long time and as Father's Day is nearing they are making a comeback. I have been wanting to make one for ages and finally found time to do so in between work, gardening and fence painting.
My finished wallet looked so effective that Chris thought I had a real wallet sitting on my desk.
 To get the wallet size I measured my son's wallet, he was hoping I would put a few notes in it for him. I decided how many pockets I wanted, which in this case was three, and used my circle punch to add the wallet detail. I also inked everything with walnut stain DI and added the faux stitching.
 I knew I wanted to add a pocket for a photo window, just like a real wallet. When I put the wallet together I added the brads to the front first then attached the strap to the back of the wallet. I also rounded the edges of the pockets.
The only thing I would do differently when I make this again is to cut the cardstock for the inside 1/16" smaller than the outside cardstock, that way I think it will sit flatter. It would also look good if you distressed the cardstock first to make an old battered wallet.